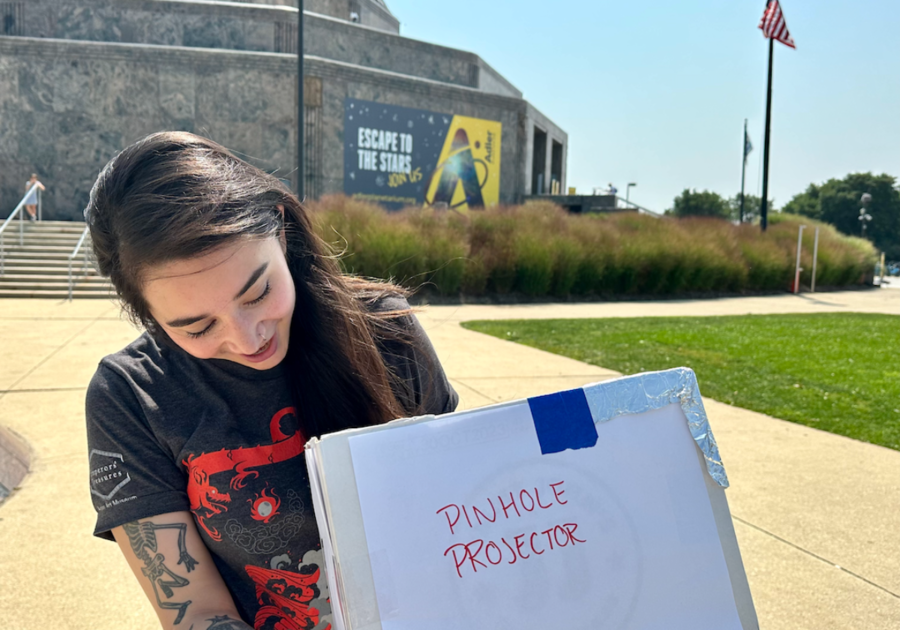
We all want a peek at the upcoming solar eclipse, and a pinhole projector offers a creative and safe solution to experience this celestial event. This simple yet ingenious device allows you to view the eclipse without risking eye damage, demonstrating how a little DIY ingenuity can bring the wonders of the cosmos right to your backyard.
Remember, never look directly at the sun with the pinhole viewer or without proper eye protection, as it can cause serious eye damage. Always supervise children and follow safety guidelines to enjoy the eclipse safely. Please refer to NASA's guidelines on how to protect your eyes during an eclipse.
Our friends at Adler Planetarium in Chicago gave us directions on how to make a pinhole projector using just a few supplies you likely already have on hand at home. This simple, all-ages, STEM-based craft can allow you and your kids to safely view the upcoming eclipse.
A video tutorial on how to make a pinhole projector from NASA:
What is a Pinhole Projector?
A pinhole projector projects an image through a small hole in an object, onto a surface, allowing you to safely observe light, like the sun. You can project the light onto a wall, the floor, or a surface on the inside of your pinhole projector.
 Adler Planetarium Adler Planetarium |
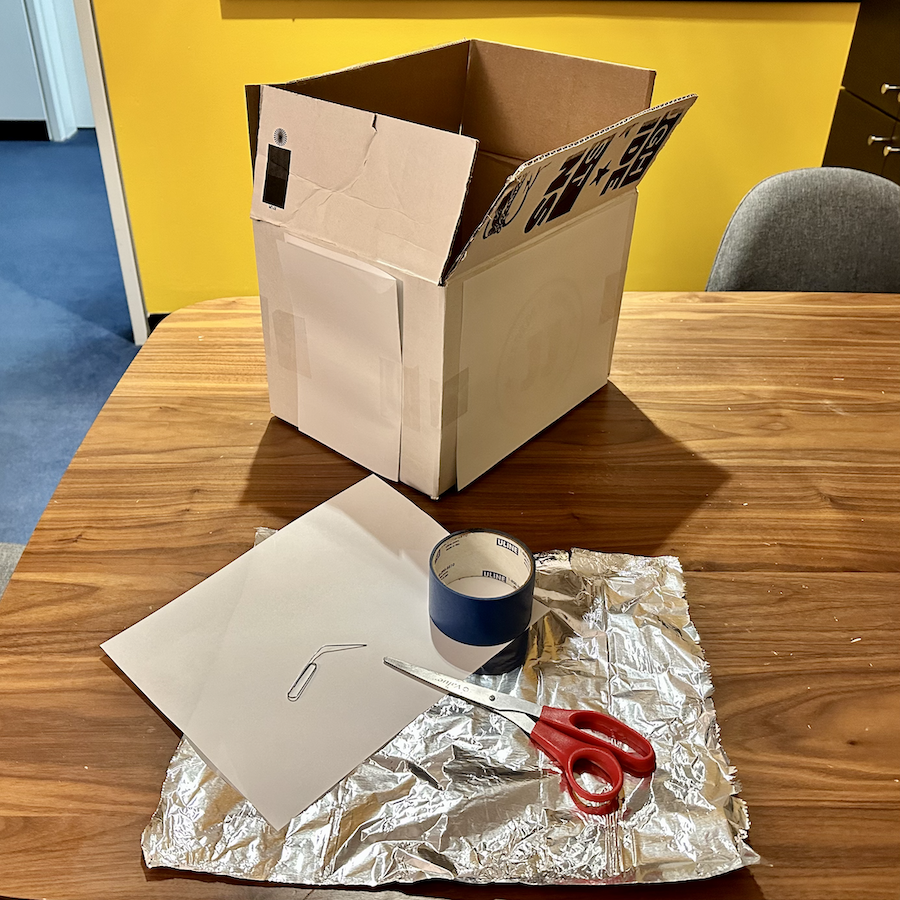
Materials needed to make a pinhole projector
Gather your supplies. To build this pinhole projector, you will need:
- A cardboard box (A cereal box works great)
- Scissors/box cutter
- Tape
- A white piece of paper
- Aluminum foil
- A small nail, paper clip, or pin — something to punch a hole in the foil
 |  |
 Photos from Adler Planetarium Photos from Adler Planetarium |
Directions to make a pinhole projector
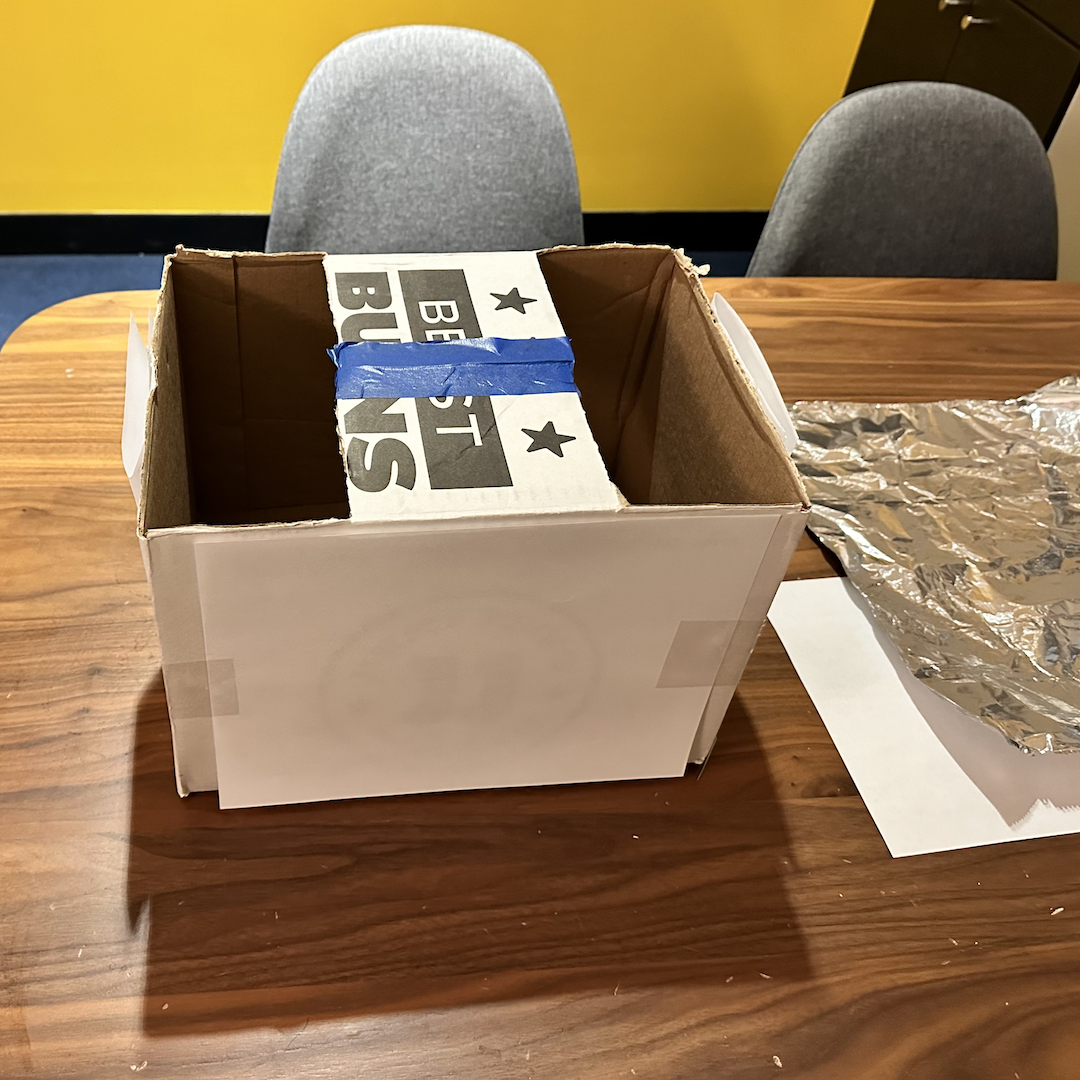
1. On the open end of the box, cut off the smaller side flaps. Cut the edges off the longer tabs, creating two open spaces on either side of the top of the box. Tape the remaining flaps together.
Optional: If the inside of your box is not white, tape a white piece of paper on the bottom to improve observation.
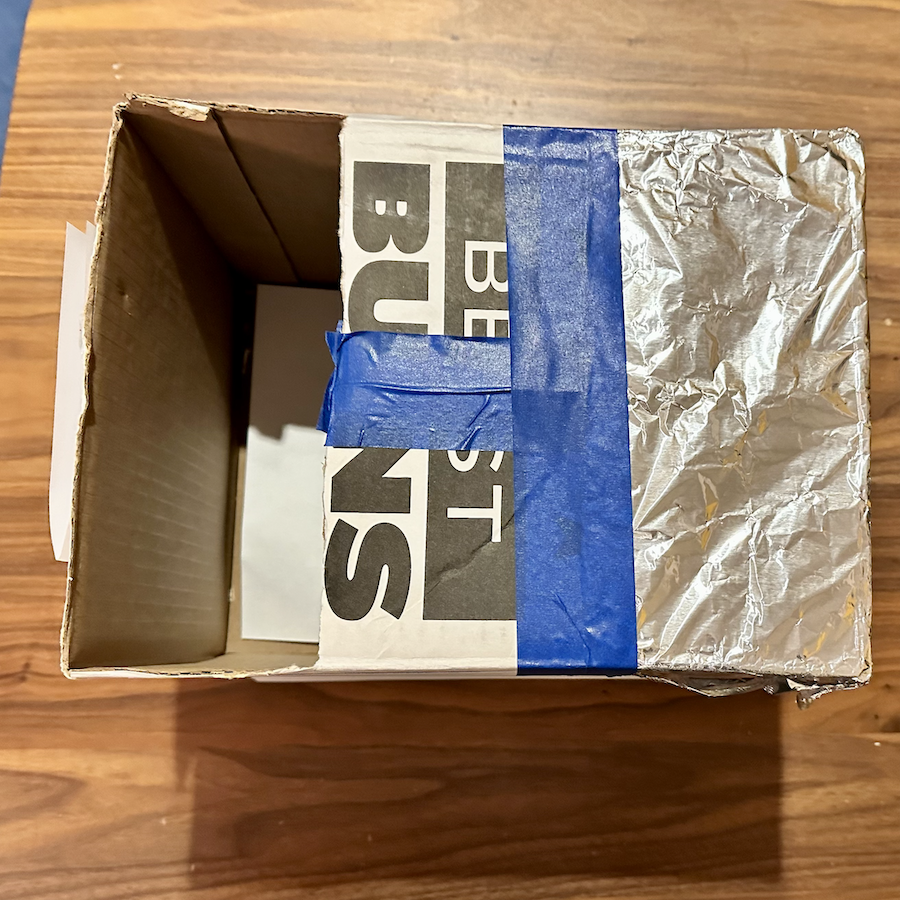
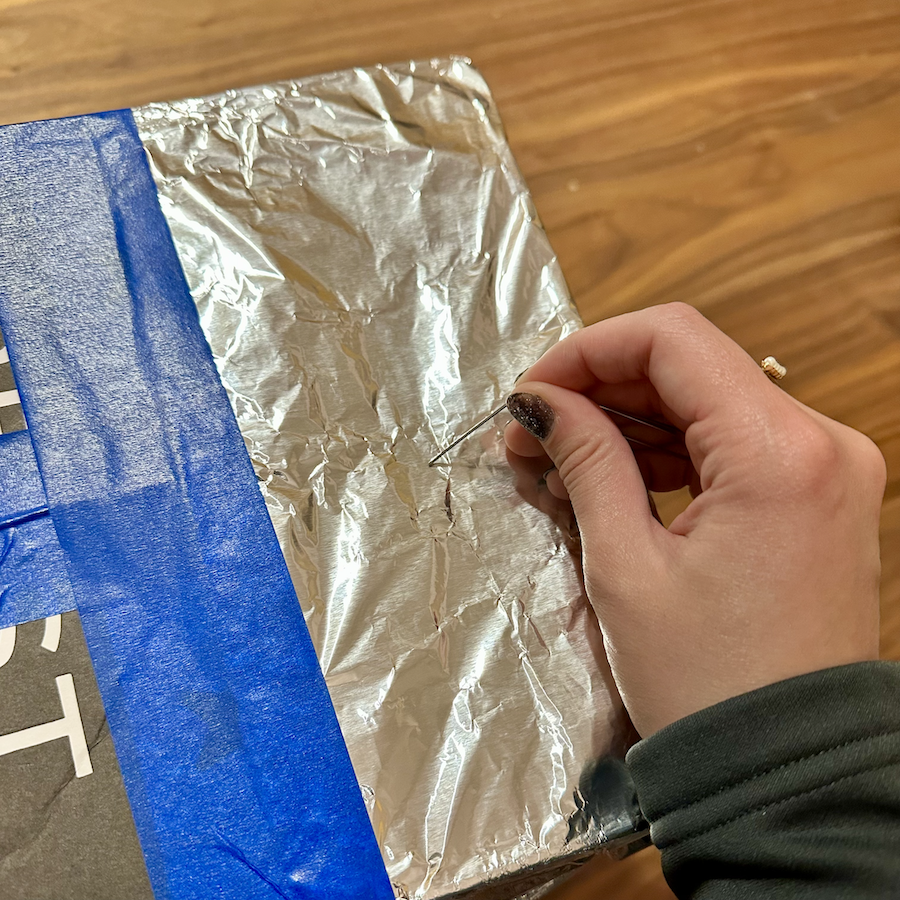
2. Grab your aluminum foil and tear off a piece large enough to cover one of the openings on the top of the box. Using the tape, securely attach the foil to the top of the box, completely covering one open side.
3. Using a paperclip or push pin, poke a small hole in the center of the aluminum foil. This hole will create a lens! You can play around with the size of the hole.
That's it! Your homemade sun observing tool is complete!
 Adler Planetarium Adler Planetarium |
How to use your pinhole projector
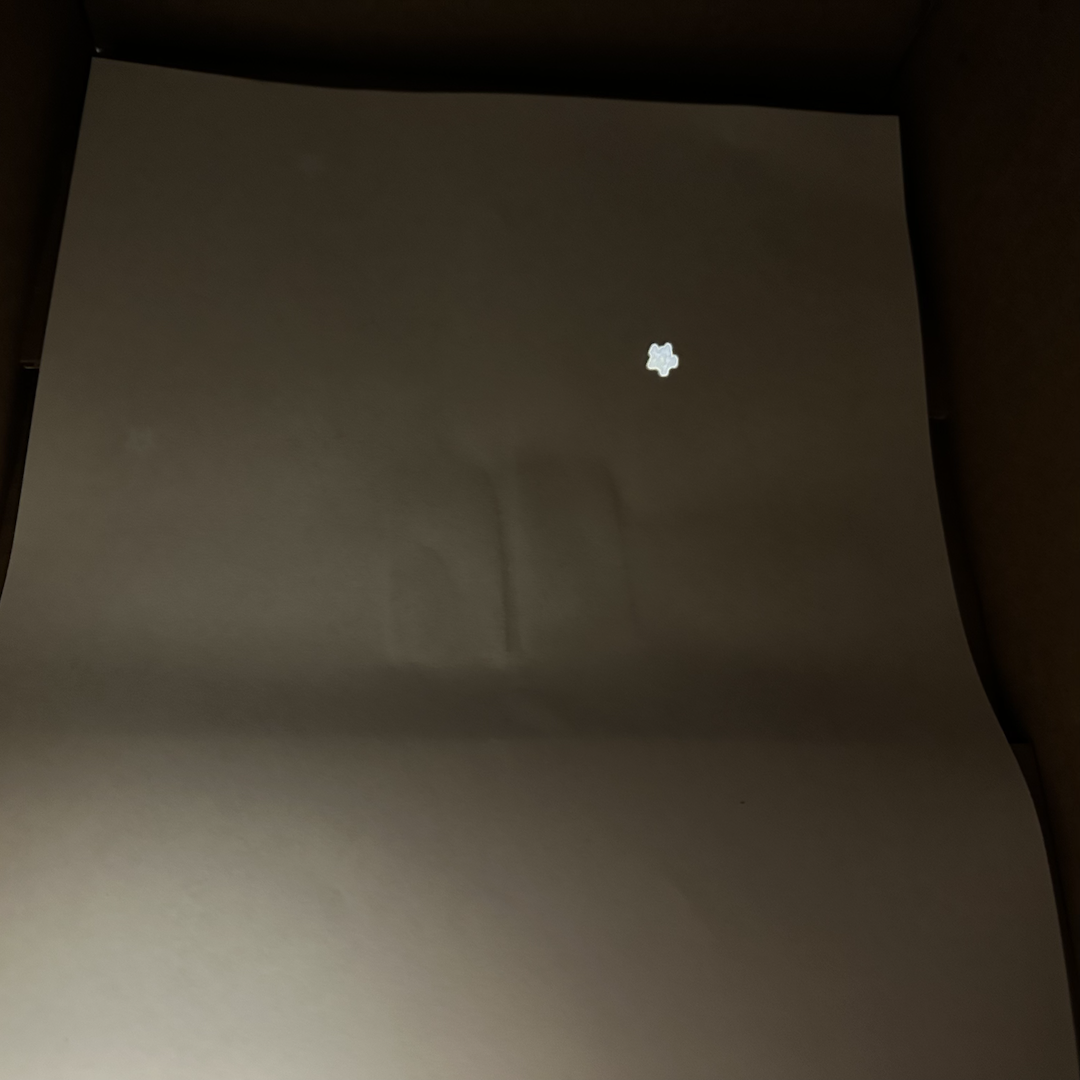
To use your pinhole projector, stand with the light source (the sun) behind you. Angle the pinhole projector so that the light shines on the foil — you may have to play with your position to get it just right. Look into the open end of the box — you will see a projection of the light source!
Adler Planetarium staff tested out their pinhole projector with the overhead light in their office and learned that their light bulbs are shaped like stars! Can you see the star shape projected through the pinhole projector?
 |
A big thanks to Adler Planetarium for sharing photos and directions for creating a pinhole projector with Macaroni KID for the eclipse.
Like what you see here and want to get all the fun delivered to your inbox weekly? Subscribe to our FREE weekly e-newsletter for all your family fun!